SSO Setup with Microsoft Entra
warning
This guide is for administrators of organizations that use Microsoft Entra as their identity provider. Also, while stricly speaking the IDs aren't sensitive information (except for the client secret), don't share them public on the internet. The demo instance shown in the screenshots has been deleted.
1. Prerequisites
- A Microsoft Entra tenant
- Your organization's identifier for the PrivateGPT instance, will be used as subdomain in
<your-organization-identifier>.chat.nebul.io.
2. Configure Microsoft Entra
2.1. Navigate to the Microsoft Azure Portal
- Navigate to the Microsoft Entra ID Portal
- Open the Microsoft Entra ID admin center
- Select "App registrations" in the left-hand menu
- Click on "New registration"
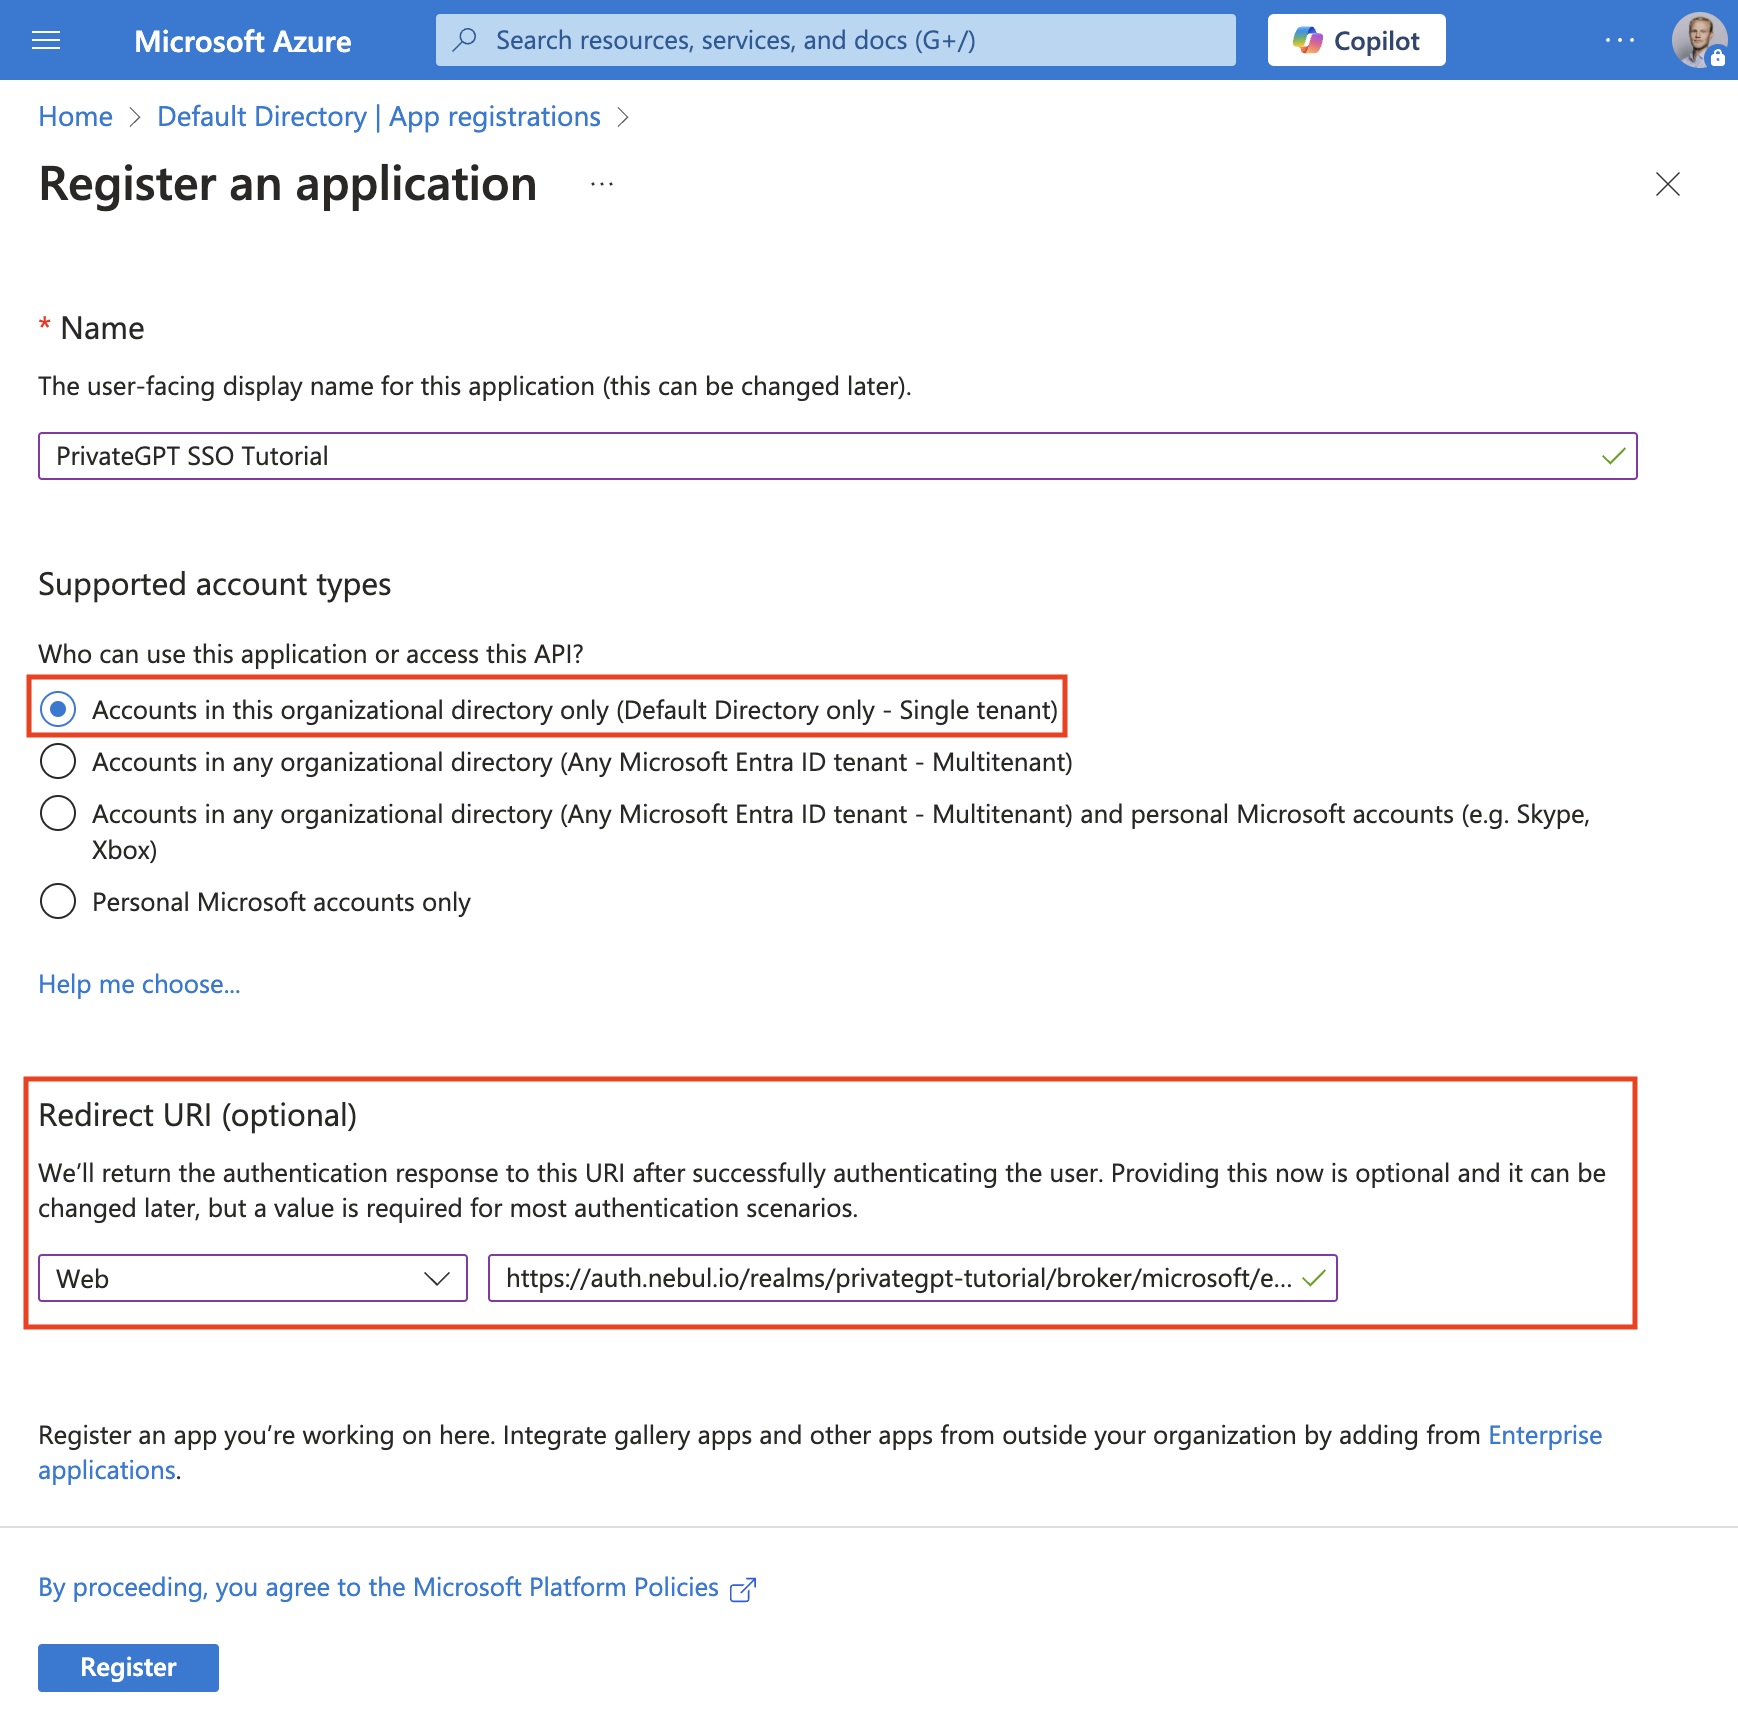
2.2. Create a new client
- Choose a name for the client, for example "PrivateGPT"
- Select "Accounts in this organizational directory only" for supported account types
- Select "Web" for the redirect URI and enter the following URI:
https://auth.nebul.io/realms/privategpt-<your-organization-identifier>/broker/microsoft/endpoint - Click on "Register"
2.3. Configure the client
- Open "Applications" in the left-hand menu
- Click on the application you just created
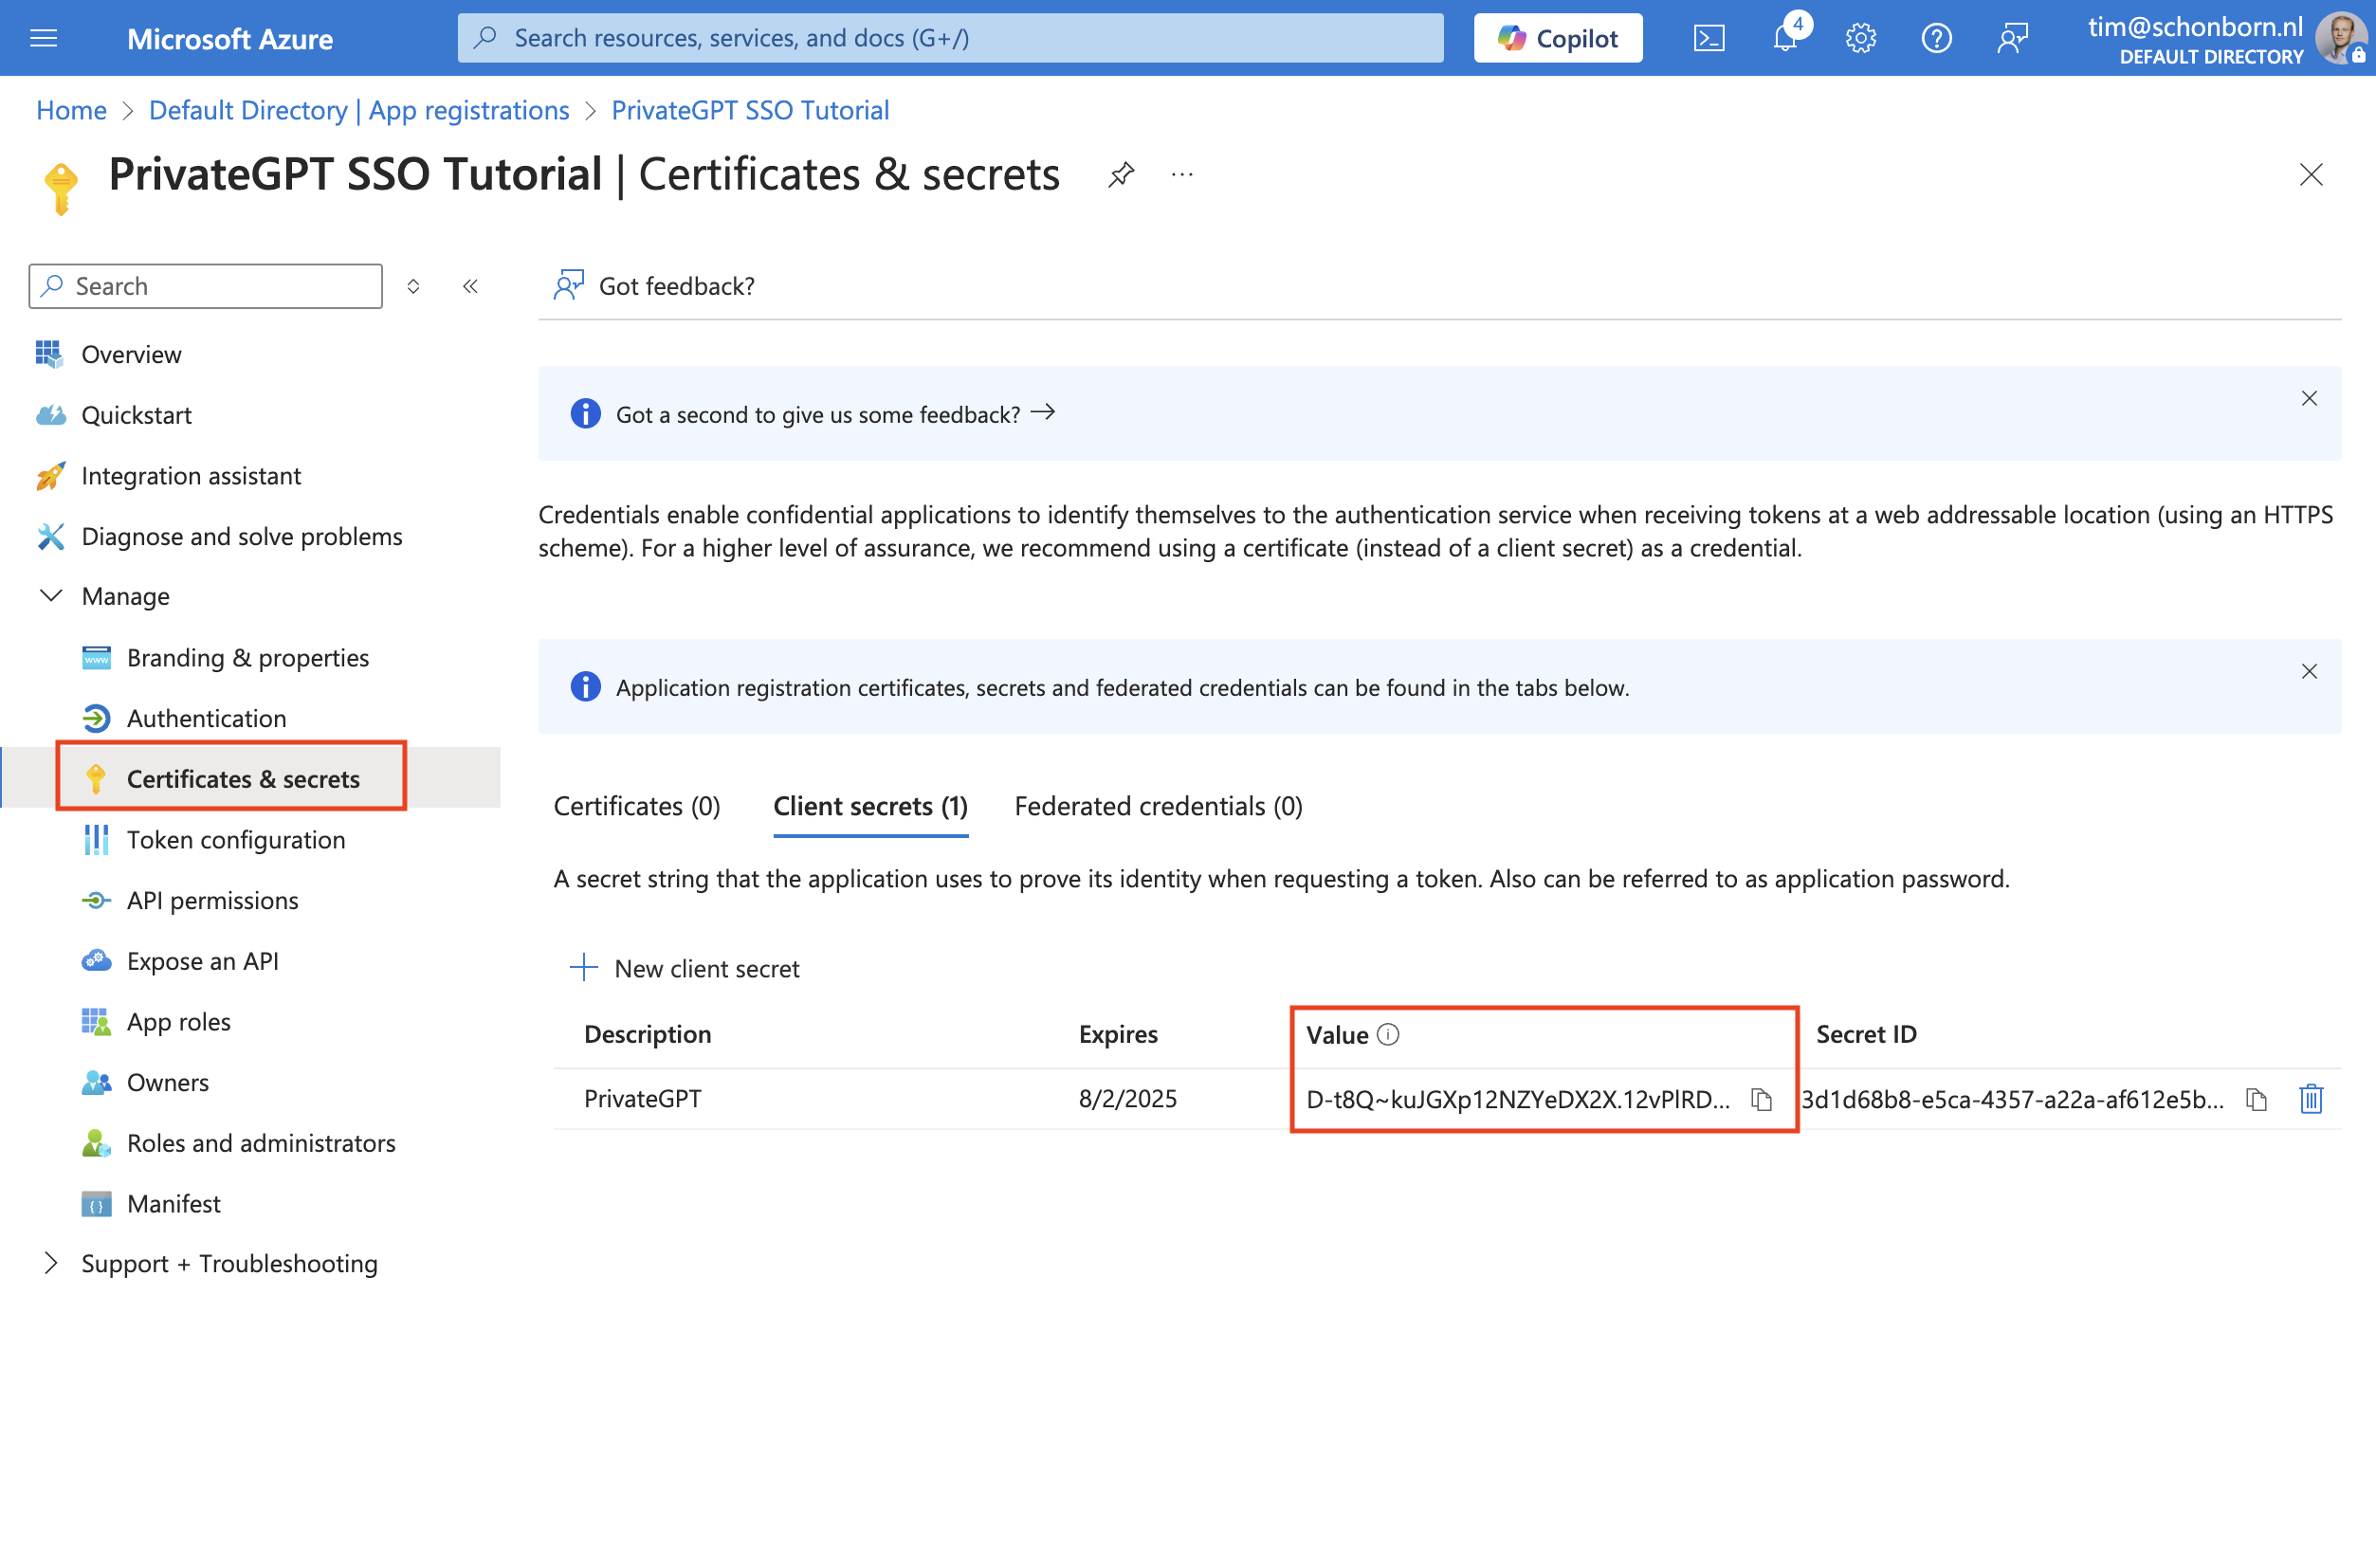
- Click on "Certificates & secrets" in the left-hand menu
- Click on "New client secret"
- Choose a name for the client secret, for example "PrivateGPT"
- Select appropritate expiration. After the expiration date, the client secret will no longer work. We recommend a one year expiration.
- Click on "Add"
- Copy the client secret (in column "Value") and save it in a secure location
- Share the client secret with us, via a different channel than the other details (will be improved in the future).
2.4. Collect App Registration Details
- Click on "Overview" in the left-hand menu
- Copy the "Application (client) ID" and save it in a secure location, you will need to share it with us.
- Copy the "Directory (tenant) ID" and save it in a secure location, you will need to share it with us.
2.5 Share the App Registration Details
- Open the form at this link
- Fill in your organization's identifier, your name, and your email
- Fill in the "Application (client) ID"
- Fill in the "Directory (tenant) ID"
- Click on "Submit"
Don't forget to share the client secret with us, via a different channel than the other details.